
Page started on April 16th, 2006. This page was last updated on October 15th, 2006; thanks for visiting!
Friends,
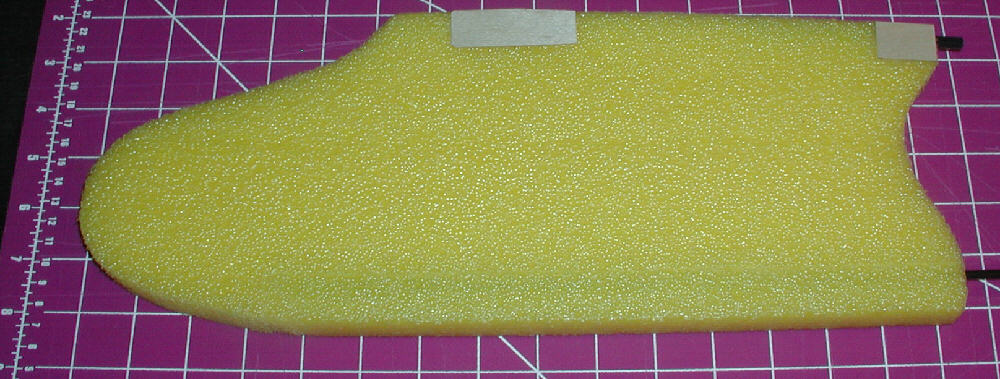
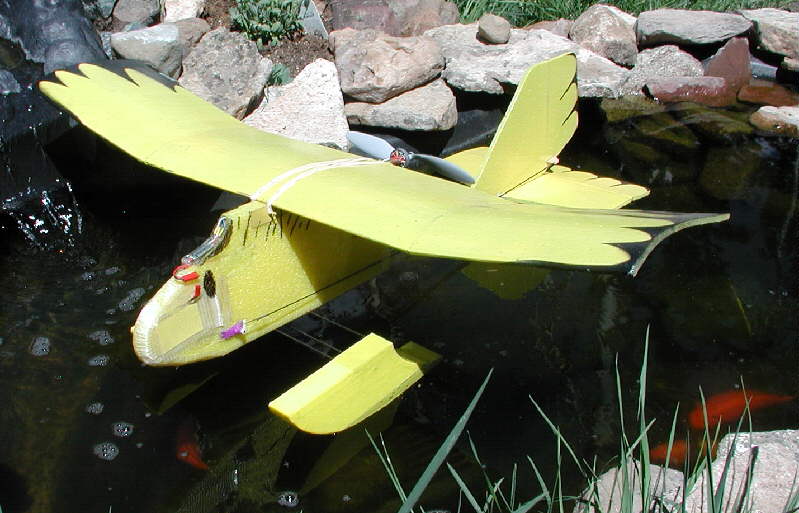
Earlier in 2006, I received a half of one of the yellow AquaRiders from another member of the South Park Beagle Squadron. I made two Woodstok forward fuselages from the 30" x 5-3/4" x 3/4" section of foam. In a design approach intended to allow flying on an inexpensive single stator CD-Rom kit motor, I decided to stretch the nose forward farther from the wing's center of lift so that the aircraft could still fly on a light two cell LiPo battery placed well forward in that extended nose. (The new nose contour matches the classic Woodstok nose profile more closely, & gives room well forward & up high for battery placement, out of harm's way on landings.)
I'm using a .157" C.F. tube for the tail boom and motor mount stick, as in the EPP Beagles; I used about 4" for the motor mount, with the remaining 25" embedded in the AquaRider foam- about 13-3/4" extending from the rear of the foam back to the tail group, while about 13" extends through the foam lengthwise for assistance in keeping the foam flying straight. (The AquaRider foam is a great material for this size / weight / performance class aircraft, but it is more flexible than the 1.3# density EPP foam I've been using previously.)
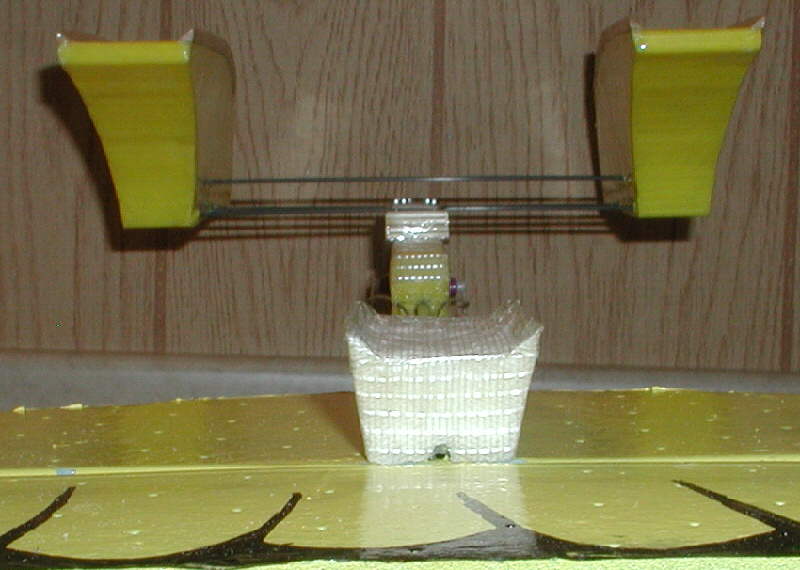
With the C.F. tube extending this far forward, the servos are mounted / installed through the foam directly on top of the front end of this tube, giving a solid setup length for the servo control linkages. A low temperature hot melt glue gun can be used if you work quickly; (watch the nozzle tip and keep it moving, as it is still hot enough to melt the AquaRider foam .)
I stretched the new Bluecor PP wing to 35-3/4" span with a 7-1/2" chord, with a 16" span flat undercambered center panel, and ~9-7/8" tip dihedral panels. Since the wings have been performing so well on the EPP Beagles, I decided to again use about 8% camber.
There are 12" bamboo skewers glued to the center of the wing at the leading and trailing edges for strength in this area where the main fuselage weight and flight loads are carried.
After increasing the wing area by roughly 15% over the EPP Beagles, I also upsized the tailgroup area by a similar proportion. Overall length is at 31-3/4".
(NOTE: Much of the building information is identical to the EPP Beagle; click here to visit the EPP BEAGLE PAGE for further information.)

Above and below, is the Woodstok airframe after receiving it's basecoat of Krylon H2O spray paint, ready for Graphics to be applied, then ready for the rest of the flight gear to be installed

The photo above shows the foam having been shaped, with the 2 degree positive wing incidence angle cut into the top rear surface area. You can see that the tail boom extends 13" forward through the foam; this is accomplished by cutting away a foam block parallel with the belly, then notching it's upper surface on the center line. Hot melt glue is then used to install the tail boom into this slot, after which the foam block is glued back in place with more hot melt glue.

Above: Underside center area of the horizontal stabilizer: the BlueCor material has it's surface film strepped away in the area where it will glue to the tail boom. A pin is then used to 'woodpecker' the foam core to allow the epoxy to penetrate more deeply.
Bolow: The tail group being glued in place, with everything blocked and held in alignment while the 5 minute epoxy sets.


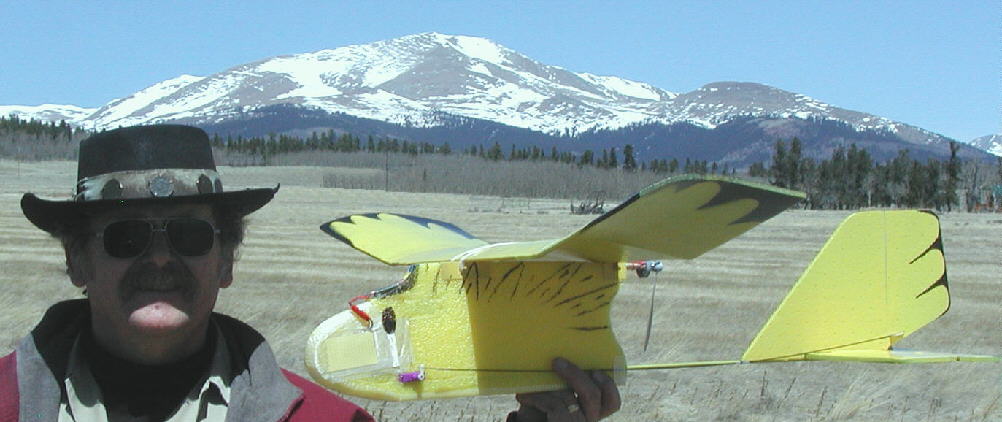


Flying weight = 8-7/8 ouinces using a 2 cell 1300 mAH LiPoly Battery
Flight performance evaluation: Superb!!!. (More soon!)
April 20th, 2006
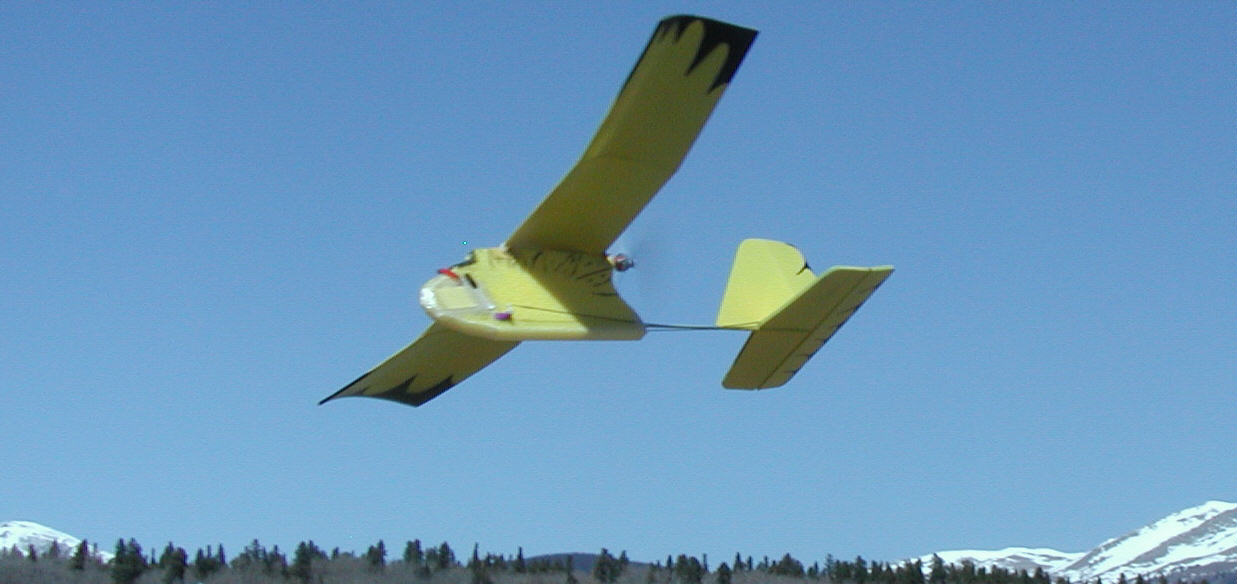
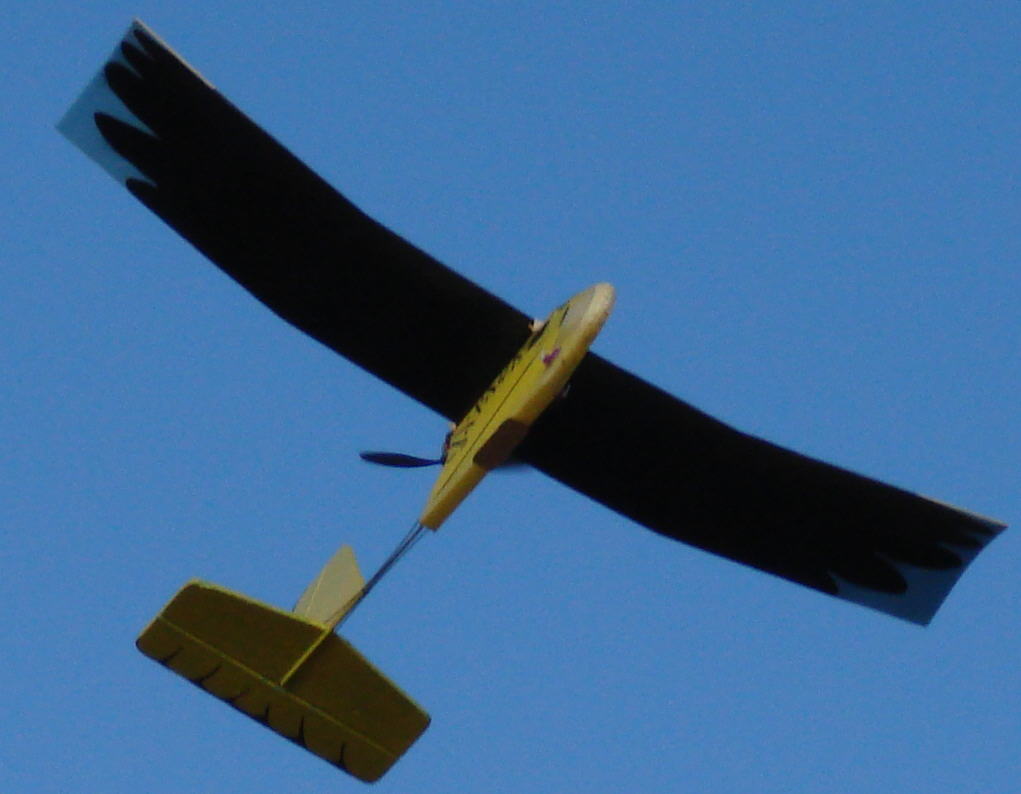
Woodstok was out for the first flights today; performance is excellent!
The brushless motor, at 7/8 ounces, is the same weight as the GWS LPS motor systems that we have been using in the EPP Beagles (about 8 of them are now in the air in the South Park Beagle Squadron so far)- but the power reserve capability with the light kit brushless motor is substantially greater! I built the motor from a http://www.GoBrushless.com
GBv Basic motor kit ($8.99), I then added a 3/4" long section of 11/32" O.D. brass tube soldered to the brass bearing holder before the motror assembly was started (for motor mounting over a 5/16" motor mount dowel / shaft), and wrapped it with 21 winds of 26 gauge wire per pole, hooked up in a Wye wiring configuration, as detailed in the GBv kit instructions which are available online.
I then added a 'wobbly' prop saver, and installed it onto Woodstok's motor mount shaft (where one of the LPS motors could also have been mounted.) It's wired to a Castle Creations Thunderbird 9 brushless ESC which was first mounted on Woodstok's 'forehead', with wires running back under the wing mount area, embedded within the foam . I'm flying it with a GWS 8x4.3 prop locally, at 10,000 feet A.S.L. (A 8x6 prop was used later for float flying.)
The same 2 cell 1300 mAH LiPoly battery that I fly in the EPP Beagles is also used to fly Woodstok; with the longer nose,this 66 gram battery pack is able to balance the aircraft well at about 35% of chord (without going to a heavier battery)- the battery is installed in the foam well forward in the nose. This allows Woodstock to be flying at 8-7/8 ounces, for a wing loading of around 5 ounces per square foot.
Woodstok climbs with good authority, and can cruise at under 60% throttle. Winds were variable with thermals marching through regularly over the hay meadows of the South Park Beagle Squadron's Aerodrome; with power to spare, Woodstok is flying superbly- as a bird should! It's easy to get low & slow & irreverent while flying Woodstok!
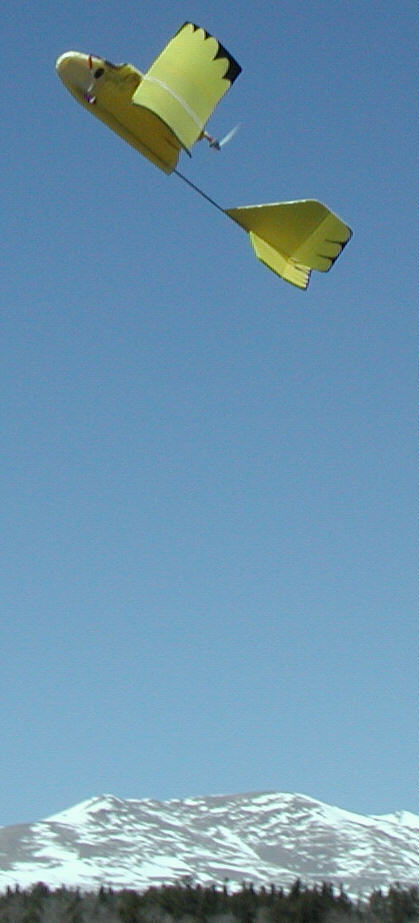
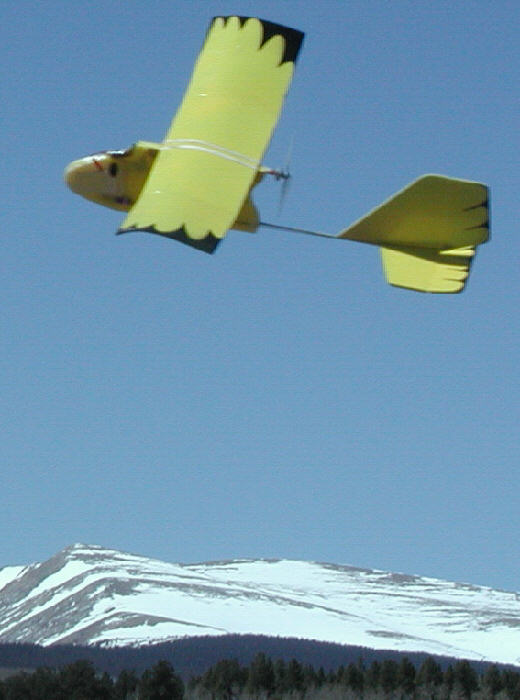
WOODSTOK Flying performance update : April 24th, 2006
With the light weight but powerful kit CD-Rom motor, WOODSTOK has power to spare! This allows flying inverted & flying outside loops - maneuvers you would normally not expect an aircraft with a heavily undercambered wing to do! Most flynig can be done at 50% throttle; at ful trottle, you can do really irreverent things! For flying with just Rudder & Elevator, this is one very agile and capable bird!
Another unexpcted performance aspect is the ability to ride thermals; again, WOODSTOK is showing fairly good capabilities in this department, too. I rode a couple of low altitude thermals for a while on Saturday. I did not try to go up where the thermals are wider & stronger, higher above the ground; but it was fun to see WOODSTOK cruising in soft lift with the throttle off for a couple of minutes at a time.
Bruce
Working with the AquaRider foam
The AquaRider Foam is very resilient & usable; there are a couple of things I've learned when working with it which you might want to keep in mind:
It is a different material than EPP; glues that bond EPP may not bond AquaRider foam. Low temperature Hot Melt glue works well if you appply it with care.
The 'cells' of the Aquarider foam are open / hollow, quite different from EPP. You need to be careful & quick with the low temperature hot melt glue, as the tip of the glue gun's nozzle will actually melt the Aquarider foam.
It does not hold paint (Krylon H2O will be easily brushed off after drying.) But Sharpie permanent markers work OK, & you can touch up the Sharpie art work periodicly whenever you want.
Running your tail boom material most of the way through the foam fuselage is a very good idea to keep the fuselage straight; the foam itself will not do the job as well as you might like...
Nylon filament tape has very agressive adhesive, and bonds very well to the AquaRider foam; other tapes may not.
(NOTE: Much of the building information is identical to the EPP Beagle; click here to visit the EPP BEAGLE PAGE for further information.)


[A bit of history on the inspiration for this design:]
Mitch Poling wrote for Model Builder magazine back in the early 80's; he was one of the main people writing articles about successful electric flight (in the days when very few of us were flying electrics), publishing plans, etc. His AquaSport design used flat bottomed floats with fairly steep side cut. I built a set of them to install on a scratch built E-powered model of my own, the 'LectraSport', and have flown them for the last 20 years. They perform very well together. The key for flat bottom float designs is to have a lot of side cut for better water separation, a clean edge at the step (or trailing edge of the hull of these front 'trike' setup floats- again, to promote clean water separation) and decent incidence of the planing surface of the float bottom relative to the wing inciudence.
Photos of the Russian 'Trike' float setups that I vaguely remember were published sometime in the early 90s. They had no 'afterbody' , but instead used a third float under the tail. They are most suitable for aircraft that can fly off the water at relatively low speeds; higher wing loading / higher speed aircraft will handle most reliably on conventional floats, where the float's afterbody contributes to the hydrodynamics.
~~~~~~~~~~~~~~~~~~~~~~~~~~~~~~
So how do they handle on the water?
[UPDATED EVALUATION:June 8th, 2006 A.M.]
I'm able to get up on step and off the water some of the time, and not at others. I'm still marginal on the thrust / speed department running the 21 turn kit CD-ROM motor on only two cells; with a hotter wind- say 19 wraps per pole instead of 21, and still flying the two cell 1300 LiPoly packs, the WoodDuck setup would likely perform better in our thin air up here at 10,000+ feet.
Other setup details can also be further optimized.
Note: the first tail float I tried was made from a scrap of AquaRider foam; it was not adequte for this job, however. It was short on displacement volume, and did not have the side cut, clean trailing edge on it's hull, and in fact had the original Aquarider rounded edges, which are terrible in terms of trying to break away from the water's suction...
I went out for test flights early one morning while the air was quiet and the water surface like a mirror. I hand launched and adjusted the trims, then settled in on the water for a fine landing. Landing handling was already excellent, and while I could ROW, the tail float was not yet performing as I wanted it to. While I got off the water several times, and landed nicely, I was not yet satisfied with the performance of the tail float.
I used a 8x4.3 GWS prop on the 21 wind CD-ROM motor (2S LiPoly) for the first three takeoffs, but the takeof run was slower than desired, and therefore longer than desired. After switching to an 8x6 GWS prop, the takeoffs were far better- very satisfactory. So the higher pitch speed helped some for ROW.
I ran back to the shop and built a wider tail float with more displacement. This one was also band-saw cut from a block of scrap EPP foam, with 8 degree side cut. It was then covered with a layer of the Scotch 'Extreme' nylon filament tape before being hot-melt glued in place.
*** Unfortunately, this float setup still does have too much water drag some of the time (when using the 21 turn motor on two LiPoly cells.) More power is the sure fix for part of that.
The main front floats should actually be mounted down lower from the belly, to give a better clearance angle for the tail & tail float- the tail rides too low right now in relation to the planing surfaces on the front floats... but again, more power is still needed to test further. If the GWS small $15.00 brushless motor were mounted, & the balance readjusted, it might do very well without any other changes.
In calm air, you can really fly irreverently from the water. With the Beagle / Woodstok's high profile and high polyhedral wing tips, however, cross-wind conditions are capable of liftind a wiing easily, and taxiing back to shore in an other than direct upwind direction may be out of the question. When the wind gets a bit stronger, it will pick up and flip the beagle / Woodstok model head-over-heels. Then the wind will get under the tail and flip it back over again. (You want your ESC and receiver waterproofed and mounted along the sides of the fusellage; I moved my ESC from on top of Woodstok's forehead after a couple of these wind flips yesterday morning.
Longer afterbodies on more conventional floats would be tremendously helpful in resisting the frontal wind getting under the wing and lifting this aircraft... so this is one disadvantage for the Trike float setup once the wind comes up... but then, the high stance and high polyhedral wing is prone to side wind effects in modest winds, too, so it's never going to be a windy day float flyer!
That's OK; it's just as easy when water flying in breezy conditions to set up to take off directly into the wind, fly around, and eventually do a slow mush landing in the grass... (it'll save a possible flip & dunking!... no use getting your ESC or radio gear damp & unhappy!
NOTE: on my Woodstok, I have the wing mount deck set at 2-1/2 degrees positive in relation to the fuselage belly and to the tail boom. The motor incidence is exactly the same as the wing incidence.
These 3" high EPP foam floats have the hull's rear planing surface section parallel to the top float surface / mounting surface, so alignment of the float hull, with the wing being 2-1/2 degrees positive to it, is a piece of cake! Now if these floats were another inch higher yet, I'd have the clearance between the tail group and the water that I would like to see.
For an aircraft with this high a profile and the high polyhedral, widening the float spacing would certainly offer better stability; 1/3 of the wingspan for spacing of floats, center to center, always helps in side-wind conditions. With the 2mm solid C.F. rods I used, the added weight would be negligable.
If I build another set of trike floats, I would do several further modifications.
So yes, I've ROW'ed quite a few times, done some touch and goes, and a lot of good water landings; but there's still room for further optimizing.
Handling on the water and in the air is fine, as far as rudder authority for taxiing on the water; and flight performance and stability in the air is still fine (although the added weight and drag of the floats are noticable with the present power system.)
Breaking the water's suction is a critical factor; having even better edges on the float bottoms would help tremendously- (especially with the present modest power system.) Adding triangle rails to the edges of the bottoms of all three floats to get a bit of a 'tunnel hull' effect would be well worth doing; I may see about cutting some from EPP, and gluing & taping them in place to the existing floats. I'll also have to extend the float upper body foam (or add height to the floats) to get the added tail group- to- water clearance that I'd like to have.... or just design another generation of WoodDuck floats!
Good thing I've got a good supply of EPP on hand!!!
The TRIKE Float Setup project continues!


Friends,
I've been flying a 7-1/2" chord, 35-3/4" span polyhedral wing on my WOODSTOK for quite a few months. After flying the 7"x48" built up night flying wing on it back in July, and finding very good handling in some challenging gusty winds, I've been thinking of building a stretched BLUECOR wing.
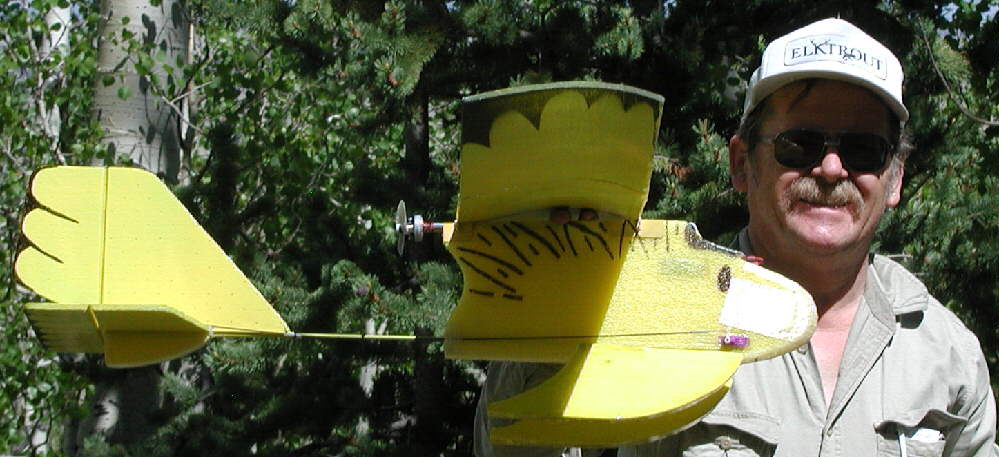
[Woodstok's tail surfaces are larger than used on the beagles, to stabilize the larger wing areas, even though the tail boom length is roughly the same. It flies very well with the larger tail group.)
On the late afternoon of September 12th I started building a 7-1/2" chord, 41" span polyhedral wing to test. (I stretched the center pannel to 17", and the tip panels to 12" each, using the same amount of polyhedral 'wing tip rise' as previously used on the shorter wing- that's about 2-1/8" at the leading edge of each tip panel.) I'm using 3/32" round bamboo leading edge and trailing edge 'spars' on the wing.
Update: 7.5" chord, 41" span thermaling wing flying on WOODSTOK
I ended up running the 3/32" bamboo across the entire leading edge of the new wing (in three sections), and along the 17" center panel's trailing edge. This wing is roughly a 8% / 40% undercamberd airfoil. (That's an undercamber height of about 8% of the total chord length, with the high point of the camber / center of lift at about 40% of chord.)
With the slightly heavier leading edge, and with the center of lift back a bit farther, Woodstok can balance for flying with a lighter 2S 1000 LiPoly battery in the same battery compartment. (This is a modestly priced I-Rate pack from CheapBatteryPacks.com)
So how does it fly??? Very well!!
I ran into town on business in the early afternoon, & stopped to do a quick test flight over the hay meadows on a friend's property. The new wing is still pale blue (for a few more hours), so it quickly blends into Colorado's incredibly deep blue sky & gets harder to see before riding a thermal very high. so I didn't push for altitude for now. It's gliding quite efficiently, and is very responsive to the rudder & elevator. It loops & does barrel rolls very nicely
Low & slow & irreverent is still easy & fun with this larger wing, & gliding in to a hand catch is very easy. Quick power-ups & climbouts from grass-top level are predictable.
The 8x6 prop is almost overkill - close to being too much pitch for this wing, even though it allows inverted flight & outside loops; but while pushing it at full throttle inverted one time, I noticed a bit of flutter in one wing tip. Let's face it- a high polyhedral, heavily undercambered BlueCor PP wing of this size is really not designed for extended inverted flight! I'll go back to test the 8x4.3 for my next flying session with this wing, to get a comparison.
Sep 22, 2006 at 06:59 AM.
Friends,
I did the paint job on the underside of the new wing, & went out late this afternoon, before the next storm moved in, to get in some flying. I swapped out the prop, back to flying the GWS 8x4.3 for this flying session.
It's flying fine! My Brother- In- Law, Tom, went along to take a few photos... then I handed him the transmitter.
(You should know this... Tom had only flown once before, flying one of the Beagles over Lake Pleasant, Arizona back in February.) For a novice pilot, he did great! Before long, after practicing doing figure eights around a pair of clouds without gaining or loosing much altitude, he moved on to doing loops, then Barrel Rolls. Landings were a piece of cake for him... so next I had him doing his own hand launches- all within less than a half hour. He's a natural! - & Woodstok makes it all so easy & predictable. It may be one of the best trainers I've ever seen... many friends agree!
I'll comment that with the 8x4.3 prop, sustained inverted flight (and especially outside loops) are not possible, as they are with the 8x6 prop. But it easily does consecutive loops and barrel rolls with the lower pitch prop.
FLY!!!


Wingspan: 34"
Chord: 7-1/2"
Ailerons added: 1-13/16" wide x 12-1/2" long each
Airfoil: Undercambered BLUECOR; 7.9% of chord, with high point of camber at ~40% chord (not counting the added flat plate ailerons)
Servo used for ailerons: One GWS NARO HP BB servo
Receiver: Berg 4L
Motor : 19 wrap Y CD-ROM motor
Propeller: GWS 8x6 Slowflyer prop
Flying weight with this wing installed, and with a 2S 1300 LiPoly battery in place: 10-1/4 ounces

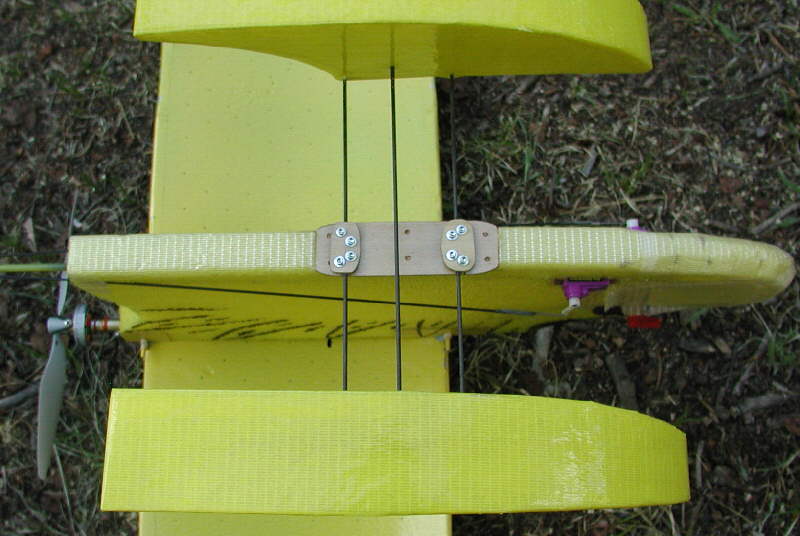
The photo above gives a closer view of the aileron linkage; the geometry from the single servo results in a lot of aileron differential : (mostly up, only a modest amount of down travel- just what an undercambered BlueCor wing really needs!)

The photo above shows the underside of the wing; there's plenty of clearance between the top of the fuselage and the underside of the undercambered wing to clear the servo with a bit of room to spare. A servo extension from the receiver (buried within the fuselage foam) allows easy connection of the removable wing.
So how does it fly?
GREAT!!! (I did a quick test flight just off the end of my driveway in a modest sized area.) There are no bad habboits noted.The Aileron response if very good, with no adverse yaw noted on the first test flight. Rolls are good, and sustained inverted flight is very reasonably accomplished. (I need to reduce my rudder ATV now; there's a lot more there than is useful once the ailerons are in service.)